By Joel Martinez and Ray West (www.basic-ultradev.com) This article examines how to integrate UltraDev with PayPal using a set of free server behaviors to solve three common online sales scenarios. The server behaviors, called the PayPal Extension Suite, are available from Mike Ahern at Shore Computers (http://www.shorecomp.com/ultradev/paypal/default.asp). The suite is free, but we would encourage you to make a donation, using PayPal, if you use his work. Using the PayPal Shopping Cart even without the aid of this server behavior suite requires only knowledge of HTML. If you can cut-and-paste text, you can easily take advantage of this functionality without the aid of this extension. However, this suite integrates extremely well with UltraDev, and gives you an easy to understand user interface. The follow three examples will teach you to use the PayPal system for three common types of transactions:
Creating an e-commerce site using PayPal is perhaps the easiest solutions to implement. The time saved in development can make this an attractive option for the project on a budget. There are certainly tradeoffs. Since all of the cart dynamics are taken care of in a popup window, other than the ability to include your logo on the cart, there is little room for customization. That being said, most sites will not require a totally customized user interface, and as such benefit greatly from using this system. The familiar interfaces produced by PayPal can actually serve to bolster consumer confidence. This being a suite of extensions, there are a number of server behaviors, each with slightly different functionality. They do, however, share certain common elements.
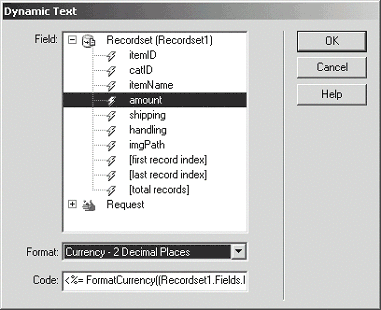 Figure 1: Data bindings palette assigning monetary formatting.
The Server Behaviors below are available in the suite to allow you to interface with the PayPal functionality.
There are two common scenarios that encompass most of the e-commerce scenarios on the web today. The single purchase is akin to the auction model in that a seller is offering only one item, and when it is gone it is gone. The shopping cart model involves the sale of multiple items, and possible multiple copies of those items. Following are three examples using the PayPal service to offer a single item for sale, a shopping cart using the PayPal Shopping Cart, and a shopping cart using a third party cart to interface with PayPal. We created a demo site that can be found at http://www.codecube.net/teksales/. The examples outlined in this article can be found at the demo site. 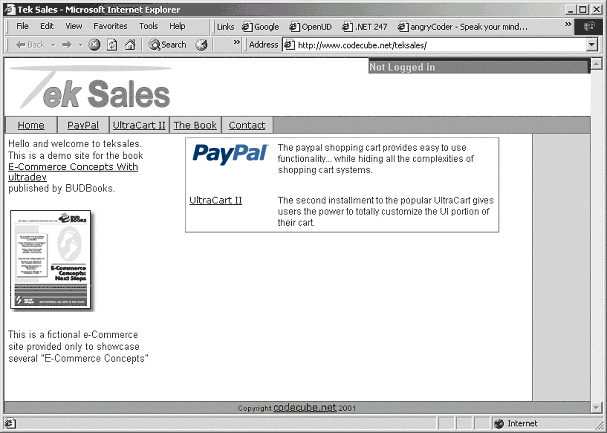 Figure 2: teksales demo site
The single purchase server behavior is used when you have one item to sell. eBay users have long embraced this functionality to collect payment for their auctions. If your site is selling more than one item, then there are other behaviors that will serve you better. But for the one-off sale of a used or collectible item, the single purchase server behavior provides a quick, simple to use option. Picture this; you've got the hottest motorcycle around, the Ducati Monster S4Fogarty. One day you're riding around when a car suddenly cuts you off changing lanes. All of a sudden your life is flashing before your eyes, and you can't bear to ride the bike another foot without breaking into a cold sweat. So you decide to sell it on your website. You make quick design in Ultradev, and post it on your site. 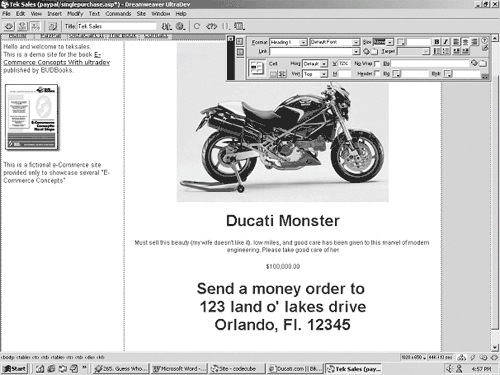 Figure 3: Ducati sale site...pre SB You figure people will be lining up at the mailbox to mail you the money for this street rocket, but alas, they don't come. There could be several reasons. Perhaps the price is more than many people can write a check for. Using the Single purchase server behavior Using the single purchase server behavior is quite simple. Once your page is designed, you need only choose an object on the page to act as the purchase button. This might be either a "Buy Me" image, or some text that conveys the same message. Highlight the object and apply the server behavior as you would any other. The single purchase server behavior can be found in the server behaviors palette under PayPal > PayPal Single Purchase. 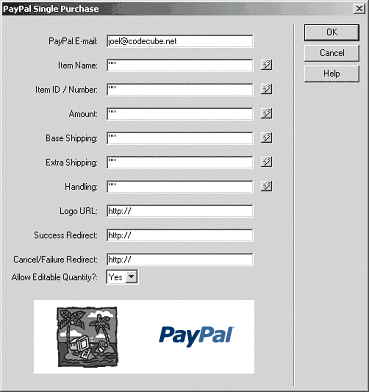 Figure 4: pp_SinglePurchase Fill out the fields in the server behavior's interface and you are all done. When a user clicks on the link generated by the behavior, a window containing payment collection information pops up, and the user is taken through the checkout process. You will receive confirmation of the completed sale from PayPal and you can then go about boxing up the motorcycle for deposit in your local mail receptacle.
The single purchase sale makes up a great many of today's internet-based transactions, especially with the popularity of online auctions. But those who intend to make their web site an ongoing business face additional concerns. They often carry a variety of products and hope that their customer will make multiple and repeat purchases from their inventory. We return to you, our budding motorcycle salesman. The sale of your Ducati made you realize the demand that exists for motorcycle related merchandise, so you have decided to build an online business that provides some. With the new PayPal online payment solution, your business is booming. You are making a great profit reselling motorcycles through your website, but you want more you decide to start selling some products to complement your motorcycle sales such as helmets and goggles. This is a simple enough concept, but you cannot continue using the same solution. On your weekly trip to Wal-Mart, you realize what you must do when you pick up a can of degreaser, and put it in your shopping cart along with the milk and eggs. You need a shopping cart, too. In simple terms, an online shopping cart allows your visitor to purchase multiple items in one transaction. As the customer navigates through the site viewing merchandise and choosing which items to purchase, the shopping cart 'remembers', either through the use of session variables, cookies, and a database, which items were picked. When the customer decides to checkout, they can enter payment information once and the order will be placed for all of their items. Using the PayPal Shopping Cart Using the Shopping Cart Server behavior is very similar to the Single Purchase behavior. But because this behavior is to be used with a shopping cart, there are a couple of notable differences. First, the is the option to allow your customer to select the quantity of a particular item, like two pairs of gloves or three leather pants patch kits. Also, the action that is performed when the purchase button is clicked simply adds the item to a shopping cart and allows continued shopping rather than trying to collect payment information immediately. To apply the Server Behavior to you item, simply highlight an object or text on your page and choose the Add to Cart Server Behavior from PayPal > PayPal Add Item to Cart in the Server Behaviors Palette. Repeat for each item in your site. 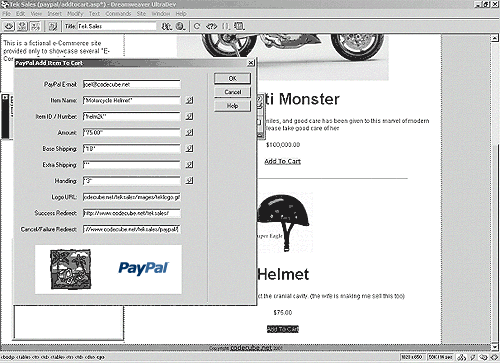 The link created will pop up a new window to the PayPal shopping cart system, and will display every item that you have added. If you click on the same item twice, the quantity amount will increase by one. This is the preferred method in this situation because shoppers want to do as little as possible to get their products, so if you save them even a couple of clicks, they are happier and happier customers buy more stuff.
The previous examples are good learning exercises, and there may even be times when you are in a similar situation and just need very basic PayPal functionality. But the power of this extension suite really shows when it is used in conjunction with a database driven inventory solution. When you use a database to manage your products, it can take a little more up front development time, but the benefits become evident later on down the road with ease of maintenance and management. If constructed correctly, your site essentially goes on autopilot. Table Structure The most time consuming portion of the construction of this type of site, is the database itself. Actually hooking into the PayPal shopping system is almost trivial. For the purpose of this discussion, we will use a classic parent/child - master/detail data structure. This is the database layout that is used in 99% of databases across the net. If you need some help with the database portion of this project, there are many resources around the web that can assist you. For every row in the parent table, there can be zero to many rows in the child table. In the context of an e-commerce site, this means that we are going to have a category table as the master, and the product table as the child. An example of some data that might be held within: TV category - Sony 20" - RCA 19" - Magnavox 32" VCR category - Panasonic Two Head - Samsung Four Head Begin by defining the Category table with the following fields:
The next table that we need, is the product table. This will hold information on each individual product, so it needs to include a field for each corresponding item in the Add to Cart Server Behavior.
As with the category table, we are using the bare minimum fields for the sake of brevity. Other possible fields include:
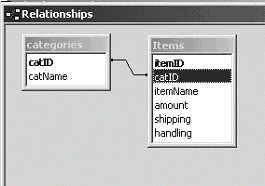 Figure 6: tekDB_relationship A graphical representation of the relationship between the two tables Once you have the database structure set up, populate the tables with some test data. This can be replaced later with production data. First, create several categories. 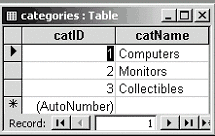 Figure 7: tekDB_catTableContents Keep in mind that each category is merely a logical container for the child products. A relationship is established between the category table and a particular product by placing the "catID" of the parent category in the numeric "catID" field of the products table. A more complex table structure could be created to handle products are might fall under more than one category, but this will suffice for now. 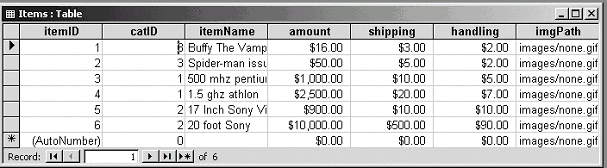 Figure 8: tekDB_ProductTableContents Displaying the data Once the database has some data you can work with, the next step is to put the data on a page. Only two pages are needed for this demonstration, a master page displaying all categories for the user to choose from, and a detail page showing all items for the chosen category. First, create an HTML table for the user interface. A table with 2 x 2 dimensions will work fine. The first row will be a simple header, describing the contents of the column below it, and the second row will be where the recordset output is held. Create a recordset that chooses the category name and ID from the table. Drag the category name from the data source palette to the first column second row. The second column will hold a "view" link. To create the view link, begin by highlighting the text and using the property inspector to navigate to the page on which the products will be displayed. Click the folder icon and you will be presented with a list of the existing pages within your site. Select the products page and then click the Parameters button near the bottom of the dialogue box. It the Parameters window, you can create a URL parameter called catID (which is used in the products recordset to filter) and assign a value from the database by selecting the catID field using the lightning bolt icon. Now when the view button next to that category is click, the corresponding ID will be passed to the products recordset in the URL string and only the products in that category will be displayed on the detail page. Once that is completed, you can add the repeat region server behavior to the second row. Now that we have the category page working, the next step is to create the detail page. We know that anyone arriving at this page will be from the category page and as such will have the catID in the query string. So we begin by creating a recordset that gets every field in the table, we filter the catID by the value from the query string using request("catID"). 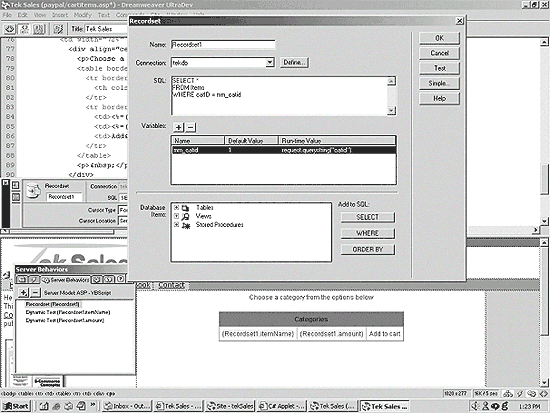 Figure 9: tekDB_categoryRS The user interface for this table can have exactly the same layout, except for an extra column for the price. Drag the item name to the first column, the price to the second, and type "Add to cart" in the third. Highlight the "Add to Cart" text, and choose the Add to Cart Server Behavior from the Server Behavior's Palette. Most of the fields on the user interface have a little lightning bolt next to the textbox. These allow you to populate the fields with fields from your database via the recordset that you have created in the Data Sources Window. Choose a field from the database for each corresponding item in the server behavior. Once this is done, you can add a repeat region to the second row. When the products are populated onto the page from the database at run time, each Add to Cart instance will have the appropriate information attached. Any item that is clicked for purchase will update the shopping cart with the information that you have entered. Maintenance can now be performed on item within the database without having to edit your HTML pages.  Figure 10: tekDB_Addtocart That is about all there is to it. Customers can now browse your catalog of items, choose the ones they wish to buy, and check out. Rapid application development is one of the main things that make the PayPal suite a great e-commerce contender. Other shopping cart systems take a great deal of development time without really addressing the payment collection issue. This demo was created in about an hour using the power of Dreamweaver UltraDev and the PayPal extension suite. This article is an excerpt from the new book UltraDev E-commerce Concepts: Next Steps by Ray West, Tom Muck and Joel Martinez. For more information about UltraDev and E-commerce, please visit Basic UltraDev at www.basic-ultradev.com. There you will find information about our books, tutorials and extensions that can greatly increase your web development capabilities. DISCLAIMER: The following content is provided by each article's individual author and not by PayPal, Inc. or any of its affiliates or subsidiaries. The articles may contain errors, and PayPal does not endorse or provide support for their content. PayPal advises that you contact the authors of the articles for questions, information about technical support, warranties and/or licenses, if any are necessary. If you choose rely on the content in any of these articles, you do so at your own risk. PayPal will take no responsibility for any errors, harm or other damage that may occur as a result of your reliance on this content, including any incidental, special, indirect or consequential damages. PayPal EXPRESSLY DISCLAIMS ALL WARRANTIES regarding this content and the use of this content. |